How to Convert MBOX to PST Manually by Outlook.com?
Would you like to convert MBOX to PST manually? Are you looking for a better solution to protect your MBOX data file? If you’re one of them, then you have landed at the right place because here, you’ll get your all solutions. For more information give a complete reading to the guide.
Multiple users found PST better than the MBOX therefore they start to switch towards MS Outlook.
Before going further to the solutions to convert MBOX files to PST, first let us discuss why many of you do so.
What Necessity to Convert MBOX to PST?
For the MBOX to PST conversion, you all may have your own reasons but there are some common reasons due to which users are initiating this conversion. Because of the drawbacks of MBOX file format and the advantages of PST files, people convert their file format. A few of the reasons are:
- The first and foremost reason is that MS Outlook has many better features, like cost-efficiency than Email clients that support MBOX file format.
- The second reason could be the need for an internet connection while using MBOX files, whereas PST files can be used offline.
- MS Outlook PST file is more advanced than the other email clients who support MBOX files.
- On top of that, there is no better security when it comes to protecting the data and on the other hand, Microsoft provided better security features in Outlook.
- Moreover, MS Outlook prevents data from unwanted emails, but Thunderbird failed to filter the spam email messages.
Now, as we have covered a few of the reasons to convert MBOX to PST. So, now let us discuss what can be done for this conversion.
Also Read: How to Import Emails from Thunderbird to Outlook?
Manual Solutions to Convert MBOX to PST File
There are basically three manual steps to perform the conversion, follow each step carefully-
Steps to Configure Outlook.com into Thunderbird
The first and foremost step to convert MBOX to PST manually is to configure the Outlook.com Id into the Thunderbird application. To operate the conversion follow the given steps-
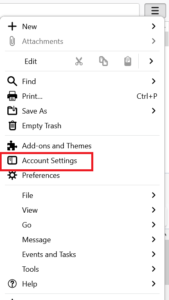
1. Open Mozilla Thunderbird and go to the right panel Thunderbird Menu >> Account Settings
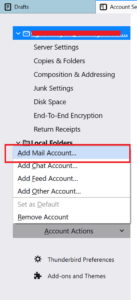
2. Then after, choose Add Mail Account option
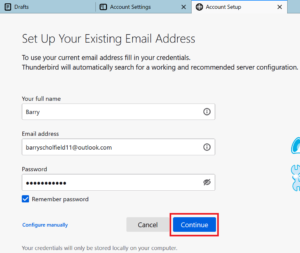
3. Now, setup your Outlook.com account and click on the Continue to proceed further
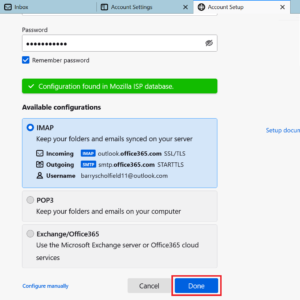
4. Following this, Configure IMAP Account and tap the Done option
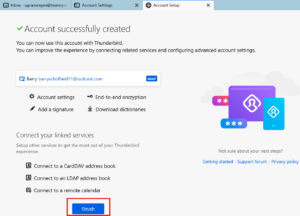
5. By doing so, you’ll get notified about the successfully configured account. Lastly hit the Finish button.
Import MBOX File with ImportExportTools NG
After successful configuration of the Outlook.com account into Thunderbird, next, you need to add an MBOX file with ImportExportTools NG. However, Thunderbird is an email client with basic functionalities but you can use add-ons to integrate extra functions in the Thunderbird application.
ImportExportTools NG is the tool that can be used to import and export messages, folders, and profiles easily. Follow the below-mentioned steps to know more-
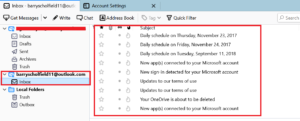
1. Now, you can view your Outlook.com emails in Thunderbird
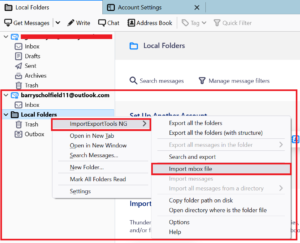
2. After this, select Local Folders >> ImportExportTools NG >> Import MBOX File option
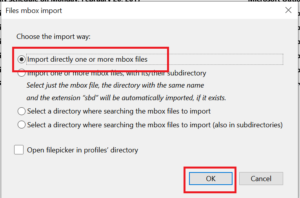
3. A new pop-up will arrive, from the given options choose Import directly one or more MBOX files and hit the OK button
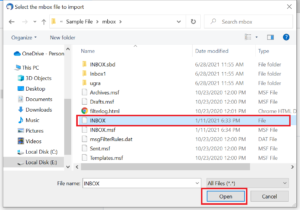
4. Next, Browse the MBOX file folder and click on the Open icon
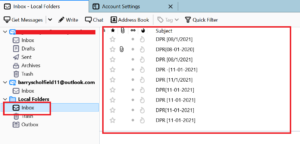
5. By doing so, the Inbox folder will be imported to the Local Folders
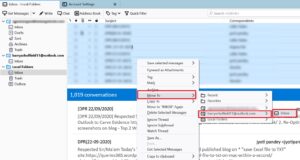
6. Following this, select all the desired emails that you want to move Right-click >> Select Move To >> Outlook.com ID >> Inbox folder.
This is how you can add an MBOX file with the ImportExportTools NG.
Steps to Configure Outlook.com in MS Outlook
As of now, you have victoriously imported the MBOX file in Thunderbird, so, the next step is to configure the Outlook.com Id in MS Outlook. To do so, follow the steps-
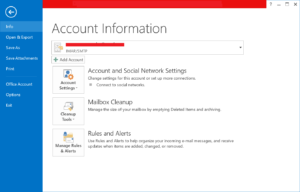
1. Open MS Outlook and select the Info option from the given options
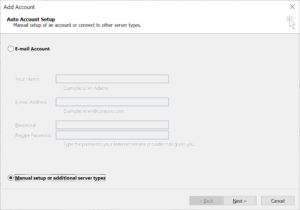
2. Click on Add Account. A new window will appear, select the Manual setup or additional server types option. Mouse click the Next button
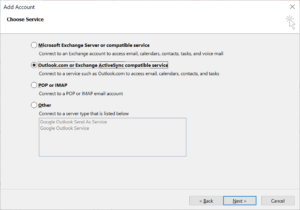
3. Afterwards, from the new pop-up of choose service, select Outlook.com or Exchange ActiveSync compatible service. Then after, click the Next option to proceed further
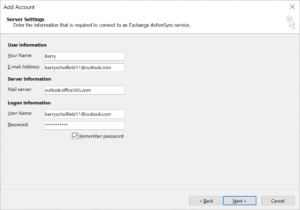
4. Hereafter, in the Server Settings window, add your required information, and click Next
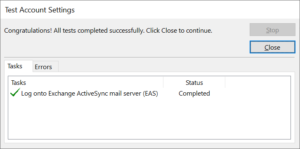
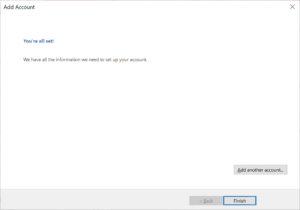
5. A new window will pop up notifying you about the successful completion. From this, click Close to continue the process
6. You will be notified of the entire setup. Click Finish button
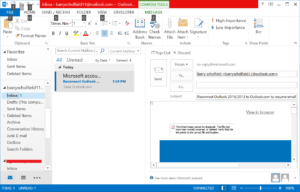
7. Now, you can view all the emails of the Outlook.com account in MS Outlook.
Drawbacks of the Manual Method
- Must have an Outlook.com account to convert MBOX to PST manually, you must have an Outlook.com account.
- Thunderbird Installation. To do this conversion process, Mozilla Thunderbird must be properly installed on your computer.
- Must have ImportExportTools NG Add-on. Without the ImportExportTools NG Add-on, you can not perform the task, as you will not be able to the further process.
- Outlook Application is Mandatory. Without Outlook application is this conversion can not be possible, therefore, you must install the Outlook application on your local system.
Automated Solution to Convert MBOX to PST
As we have discussed the manual methods to this conversion, but there are a few drawbacks along with it. It’s a lengthy process along with the above-mentioned limitations. Hence, here comes a need for an expert-recommended automated solution to do the conversion. The best RecoveryTools MBOX Migration Tool is one of the best and reliable methods to help you out.
Moreover, there are no such limitations. There is no need to install the Mozilla Thunderbird application on the system. You can even add MBOX files easily without the Import-ExportTools NG. It does not require the Outlook.com account to configure into the Outlook application. On top of that, your crucial data is fully secure and safe with this tool.
Conclusion
In this guide, we have discussed solutions on how to convert MBOX to PST manually. There are basic manual methods that you need to follow but it has some limitations along with it. Hence, the RecoveryTools Software is the best solution to help you out in this situation. You can do the conversion by performing a few simple steps with this utility.
Related Posts
